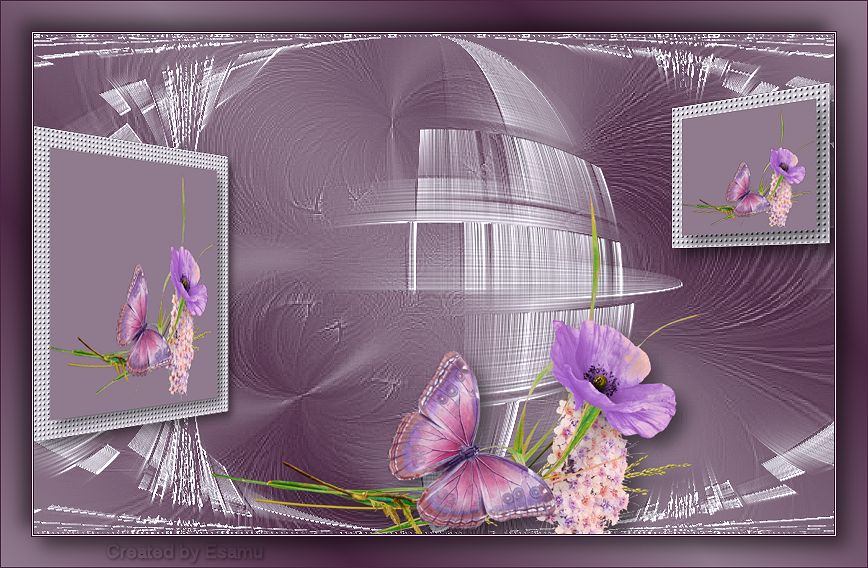
 Lilla dream
This Lesson is copyrighted to © esamu2023.
This Lesson may not be forwarded or shared or otherwise placed on any
Web Site without written permission from © esamu
This tutorial is my own design
and any resemblance to any other tutorial is purely coincidental.
It was created in PSPX6
Supplies:
0_b8fcb_a81db1ec_orig.png
1342769824_48.jpg Mask
13427669820_46.jpg Mask
Tube and the Masks are from the internet unknown to me.
Plugins:
MV's Plugins –Perspective Transformations
Toadis- Weaver
Emboss_3Emboss_3
Colours I used
Foreground # 907b8e
Background# 4a2642
colour3#d0cad6

Preparation
Download the materials, open in PSP ..Window
Duplicate, minimize, close the original.
1.Step
Set your foreground color to # 907b8e
Set your background color to # 4a2642
Gradient
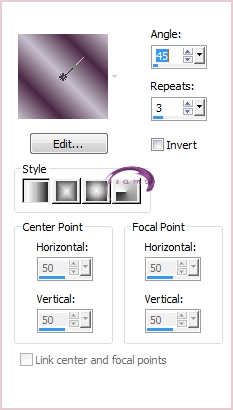
Angle 45
Repeats 3
Linear
Maximize the lilaalpha.pspimage
Flood fill with Gradient
Adjust…Blur…Gaussian blur 35
2.Step
Layers:New Raster Layer
Flood fill with colour3#d0cad6
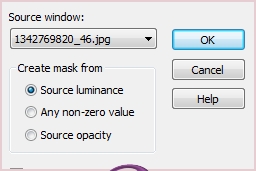
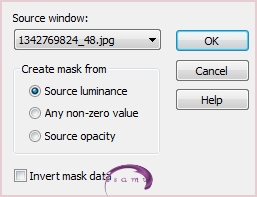
Layers:New Mask Layer:From Image
Layers Merge Group
Effects:Edge Effects.Enhance
3.Step
Layers:New Raster Layer
Flood fill with #d0cad6
Layers:New Mask Layer:From Image
Layers Merge Group
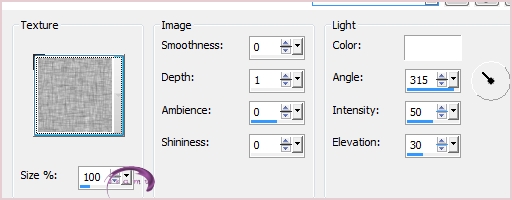
Effects:Texture Effects:Canvas
4.Step
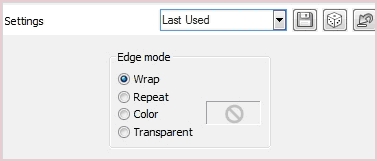
Effects :Plugins –Toadis…Weaver Effects…Edge Effects… Enhance

Effects:Geometric Effect:Circle…Wrap
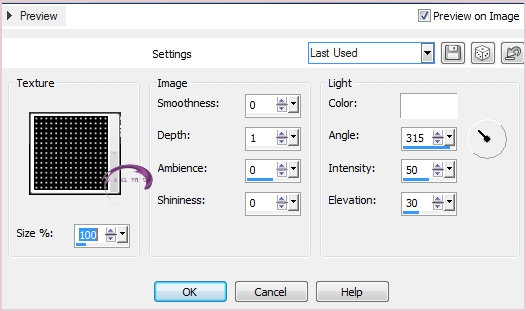
Effects:Edge Effects:User Defined 3Emboss_3
5.Step
Layers:New Raster Layer
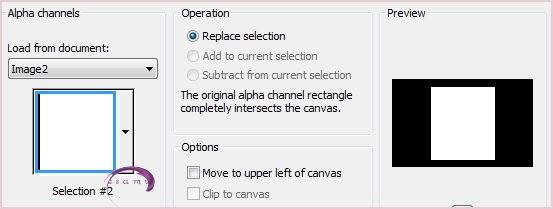
Selections:Load/Save Selection:Load Selection From Alpha Channel
Flood Fill with #d0cad6 color
Effects Effects:Texture GirdSelections…Modify…Contract 25
Selections:Modify:Contract 25
Layers New Raster Layer
Flood fill with #907b8e color
Maximize the0_b8fcb_a81db1ec_orig.png image
Edit:Copy:Paste Into Selection
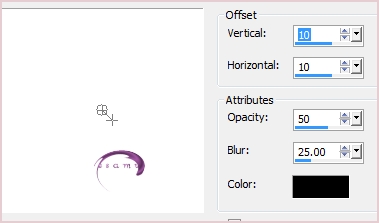
Effects 3D Effects:Drop Shadow
Selections:Select None
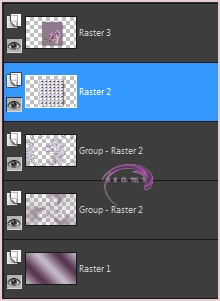
Activate the Raster 2
Repeat the Drop Shadow, same settings
Merge Down Raster 3 and Raster2
6.Step
Effects:Plugins MV's Plugins – Perspective Transformations

Image:Resize 90% All Layers not checked
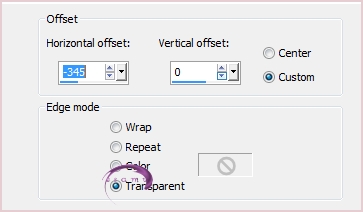
Effects:Image Effects:Offset Horizonta –345.Vertical :0
7.Step
Layers:New Raster Layer
Selections… Selections…
Load/Save Selection…Load Selection From Alpha Channel
Selection #1
Flood fill with #d0cad6 color
Effects Effects…Texture Gird…same settings
Selections:Modify:Contract 15
Layers:New Raster Layer
Flood fill with #907b8ecolor
Edit..Copy…Paste Into Selection the 0_b8fcb_a81db1ec_orig.png image
Effects 3D Effects:Drop Shadow
Selections…Select None
Activate the Raster 3
Repeat the Drop Shadow, same settings
Merge Down Raster 4 and Raster3
Effects..Plugins MV's Plugins – Perspective Transformations
Sett the Pano to: - 40.00
Effects:Image Effects:Offset 217 Vertical…0
8.Step
Edit Copy:Paste as a New Layer the 0_b8fcb_a81db1ec_orig.png image
Pick Tool

Add Drop Shadow same settings
9.Step
Layers Merge All (Flatten)
Image: Add Borders
Add Borders 1 pix #4a2642
Add Borders 1 pix #d0cad6
Add Borders 1 pix #4a2642
Selections: Select All
Add Borders 30 pix White color
Selections :Invert Flood fill with Gradient
Selections :Invert
Effects: Drop Shadow same settings
Repeat Drop Shadow -10
Selections … Select All
Add Borders 1 pix #4a2642
Selections.Select None
New Raster Layer Add your watermark
Layers Merge All (Flatten)
File… Export JEPG Optimizer compression 20


 eddatutorials 2023
All Rights Reserved
Designed and Maintained by Etelka Samu
eddatutorials 2023
All Rights Reserved
Designed and Maintained by Etelka Samu
| | | | |