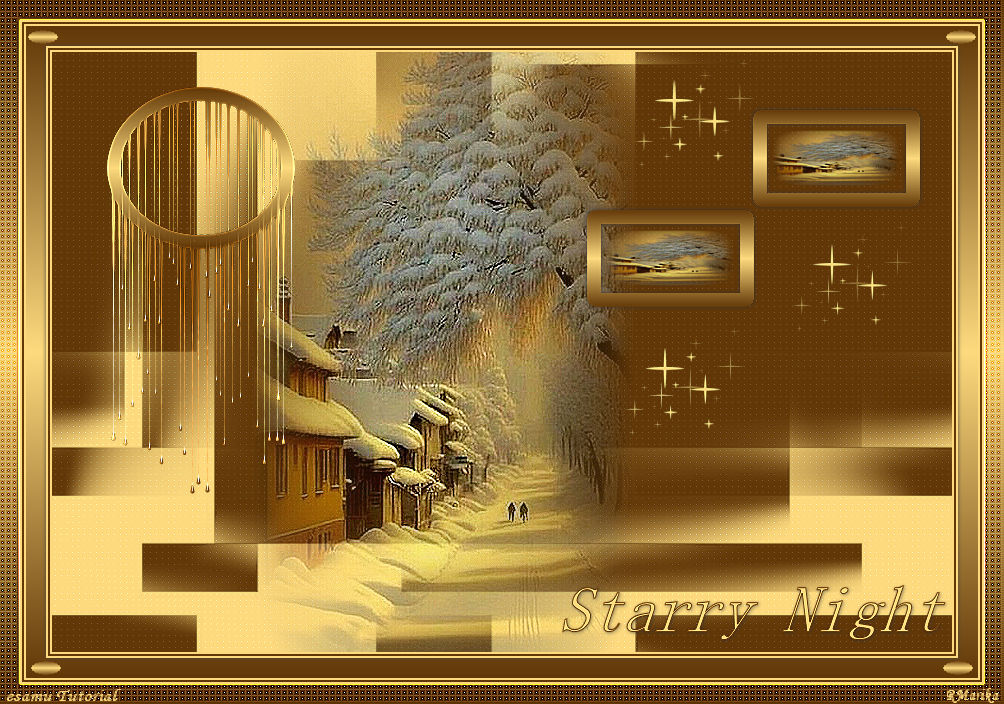
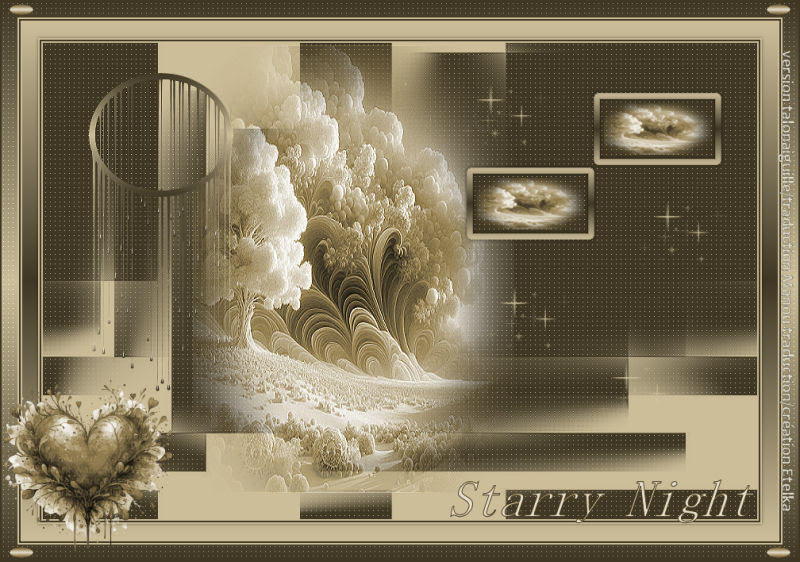
 Starry Night
This Lesson is my own creation This lesson may not be forwarded,
Shared or otherwise placed on any Web Site without my written permission
This Lesson was created in CorelPaintShop Pro2020
but also can made in the other Version
----------------------------------------

The Brush is from internet,the others are my own creation
walpha.pspimage
starrynight.png
pearl.png
mwinter.pspimage
mask5.jpg
BrushTip_StarryNight 100.PspScript
autumn.f1s
Materias Palette
Background.#613707.Foreground#fdda7e
Gradient 1
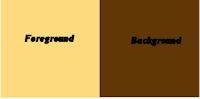
Foreground #fdda7e. Background#613707
Gradient. 2
Open Images and minimize.
Step 1
----------------------------------------
Maximize walpha.pspimage,Windows/duplicate Close the original
Flood Fill with Background color #613707
Layers ..New Raster/ Layer Flood Fill with Foreground color #fdda7e
Step 2
----------------------------------------
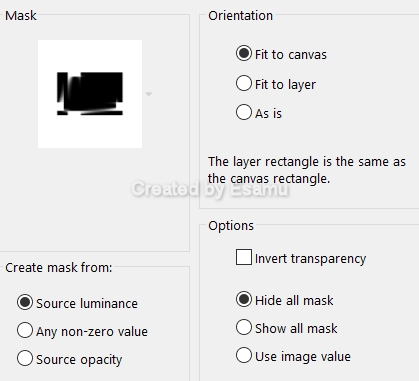
Layers.Load Mask From Disk
mask5
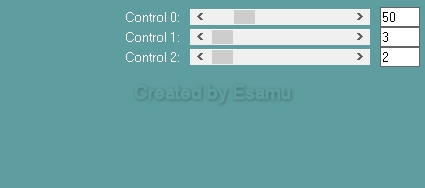
Effects/Plugins/ Carolaine & Sensibility - CS_LDots
Layers Merge Group
Step3
----------------------------------------
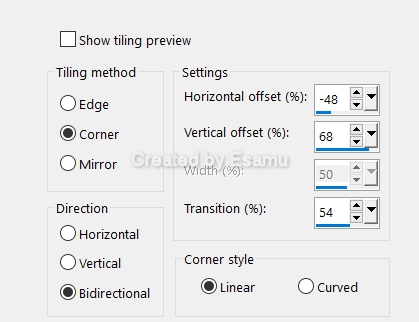
Effects/Image Effects/Seamless Tiling
Effects-Edge Effects-Enhance
Layers/Merge Down
Selections/Load Save/ Selection From Alpha Channel
Load selection #1
Selections/Promote Selection to Layer
Modify/Select Selection Borders
Both sides,Anti Alias checked, Border with 4

Layers New Raster Layer
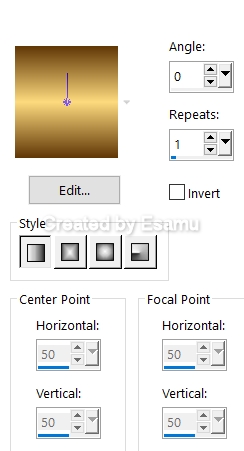
Flood Fill with Gradient 1
Effects/Plugins/Alien Skin Eye Candy 5/Drip. Autumn.fls
Select None
Layers Merge Down
Adjust/Sharpness/Sharpen
Step4
----------------------------------------
Layers New Raster Layer
Slections/Load /Save/Slection Load Selection From Alpha Channel
Load selection#2
Selections/Promote Selection to Layer
Selections-Modify- Select /Selection Borders
Both sides,Anti Alias checked, Border with 4
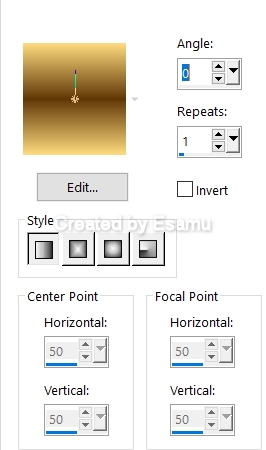
Flood Fill with Gradient2
Selections/Select None
Effects 3D Effects/Drop Shadow
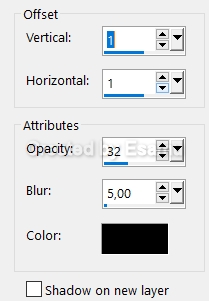
V1.H 1,Opacity 50,Blur 5.Repeat V-1..H..-1
Magic Wand, click in center
Maximize the winter.pspimage./Edit/Copy/Paste Into Selection.
Select None
Layers/Duplicate
Layers Palette
Aktivate the Promoted Selection
Pick Tool

Highlight the Copy Promoted Selection1
Layers Merge Down
Step5
----------------------------------------
Maximize winter.pspimage/Edit/Copy/Paste As New Layer
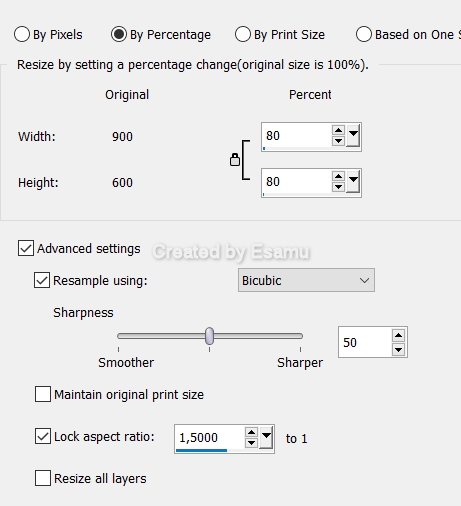
Image/resize
Pick Tool

Layers/Arange/Move Down
Effects/Edge Effects/Enhance
Layers/Merge All(Flatten)
Step6
----------------------------------------
Image /Add Borders
Add Borders Symmetric...2 pix Foreground color#fdda7e
Add Borders Symmetric...2 pix Background color #613707
Add Borders Symmetric...2 pix Foreground color#fdda7e
Select All
Image /Add Borders
Add Borders Symmetric...20 pix White color
Selections/Invert
Selections/Promote Selection to Layer
Flood Fiil with Gradient2
Selections/Invert
Effects 3D Effects/Drop Shadow
V1.H 1,Opacity 50,Blur 5.Repeat V-1..H..-1
Selections/Select None
Image /Add Borders
Step 7
----------------------------------------
Add Borders Symmetric...2 pix Foreground color #fdda7e
Add Borders Symmetric...2 pix Background color #613707
Add Borders Symmetric...2 pix Foreground color #fdda7e
Select All
----------------------------------------
Image /Add Borders
Add Borders Symmetric...20 pix White color
Selections/Invert
Selections/Promote Selection to Layer
FloodFiil with Gradient1
Selections/Select None
Effects/Plugins/ Carolaine & Sensibility - CS_LDots
Same Settings
Repeat Carolaine & Sensibility - CS_LDots
Selections/Select None
Add Borders Symmetric...2 pix Background color #613707
Step 8
----------------------------------------
Layers/New Layer
Paint Brush Tool

Locate StarryNight 100 Brush
Place it up to the right corner of the Image
few time as you like
Foreground color #fdda7e
![]()
Brusc Tool Settings

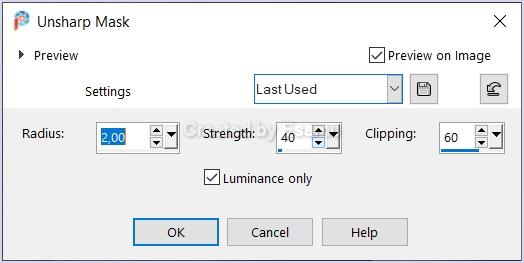
Adjust Sharpnes Unsharp Mask
Maximize the Starry Night png image
Edit -Copy Paste As New Layer
Move down to Right side of the Image
Maximize the pearl.png image
Edit/Copy/Paste As New Layer
Move it up in the Right corner
Layers/Duplicate
Image/Mirror /Mirror
Merge Down
Duplicate
Image/Flip
Layers Merge All(Flatten)
By Pixels,Width 1000,Height 700 Resize all layers checked
New Raster Layer add your Watermark
Adjust/Sharpness/Unsharp Mask
New Raster Layer
Add your Watermark
File...Export..JEPG Optimizer Compression value ..20

![]()

![]()

Marika
Vera
 Irene
Irene
Claire
![]() eddatutorials2024
All Rights Reserved
Designed and Maintained by Etelka Samu
eddatutorials2024
All Rights Reserved
Designed and Maintained by Etelka Samu
![]()
![]()
| | | | |